Somehow, it’s already November. How did that happen?! I feel like I blinked and suddenly it went from July to November. I love fall/winter, but I’m not really ready for it to be November (though, at the same time, I’m ready for it to be 2020. Don’t ask me how that works).
It has been really cold in the Pacific Northwest lately, which means it’s the perfect weather to wear cozy handmade garments and accessories, like crocheted hats!
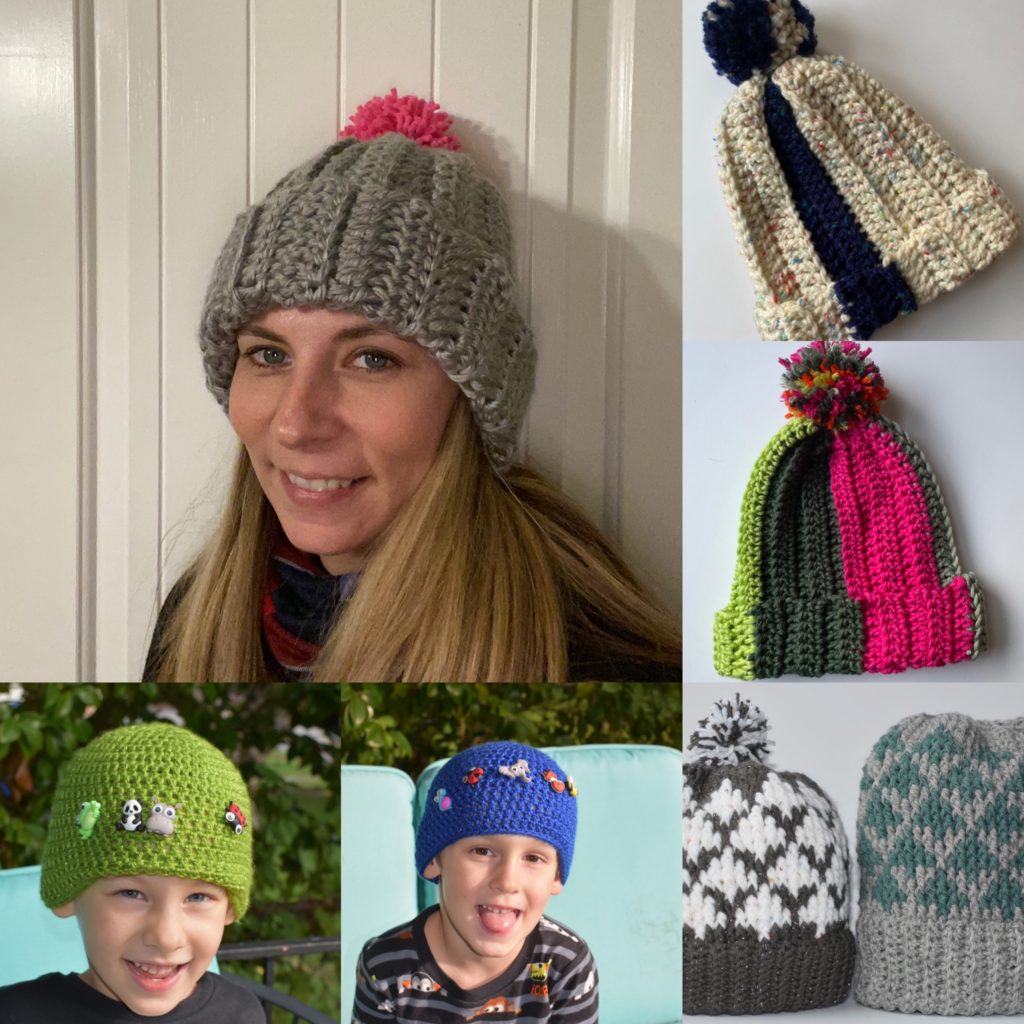
Hats are one of my favorite things to make – they work up really quickly, they are fun to wear, and they are definitely cozy. In the past month alone, I’ve made at least 8 different hats (and I have 2 more in progress).
Today, I want to share a quick and easy method to crochet a warm winter hat.
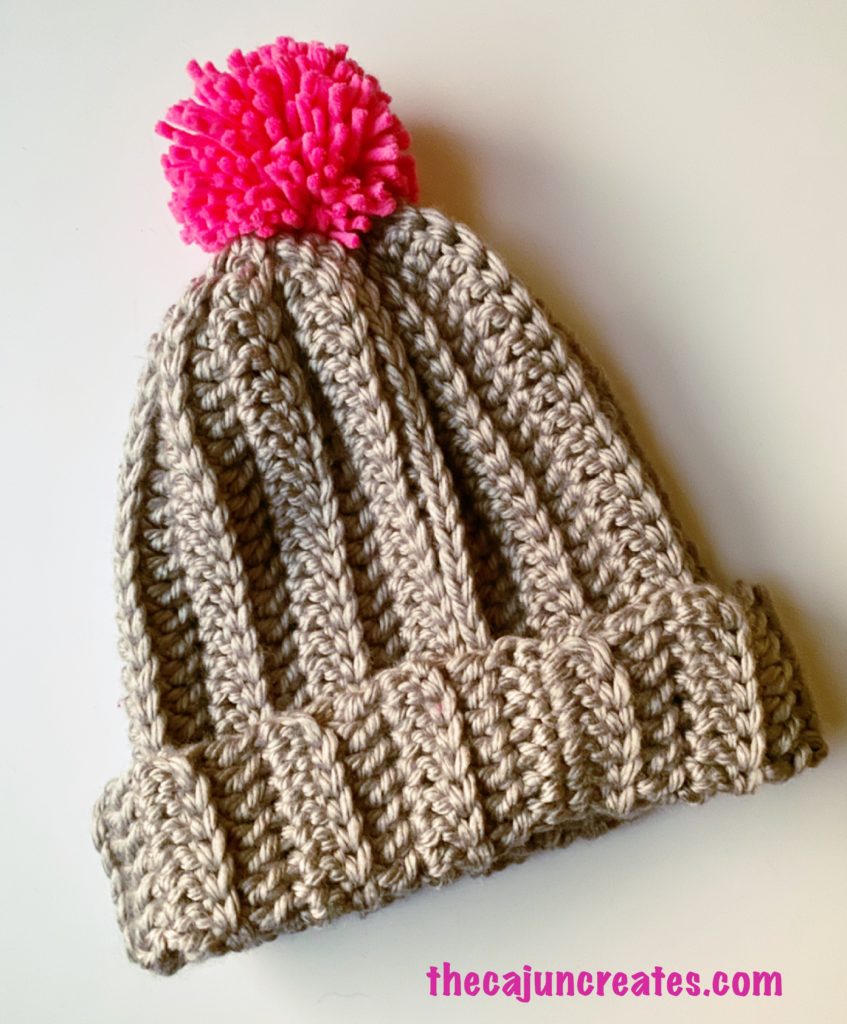
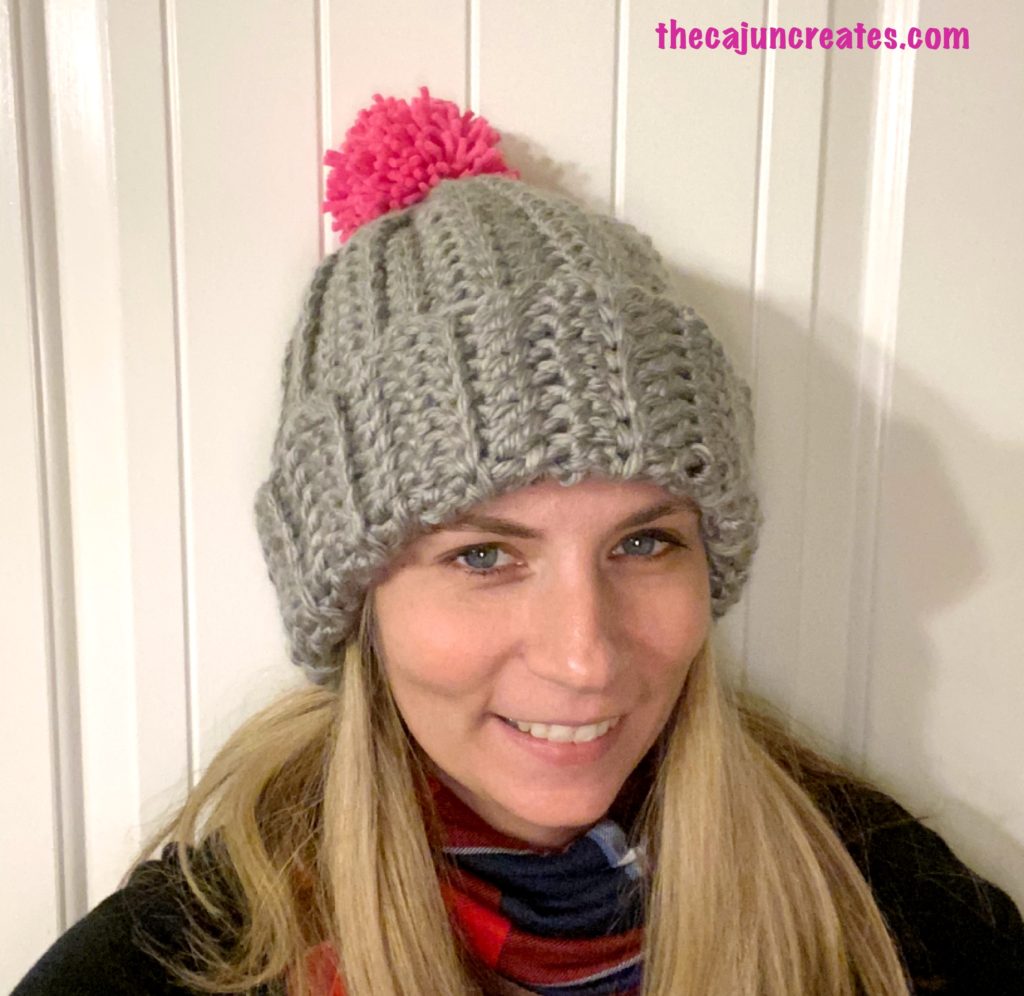
To make this hat, I used Lion Brand, Hometown USA yarn in Dallas Gray, and a size L crochet hook. I needed about 1.5 skeins of yarn to make this hat, and it took me approximately an hour to whip it up.
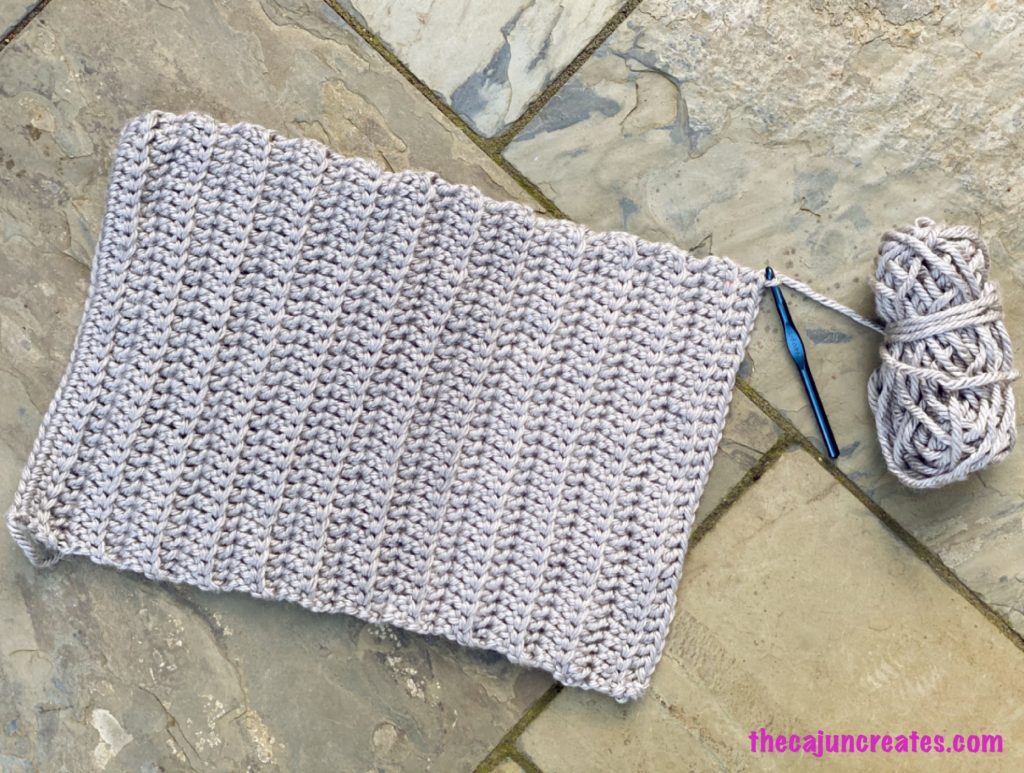
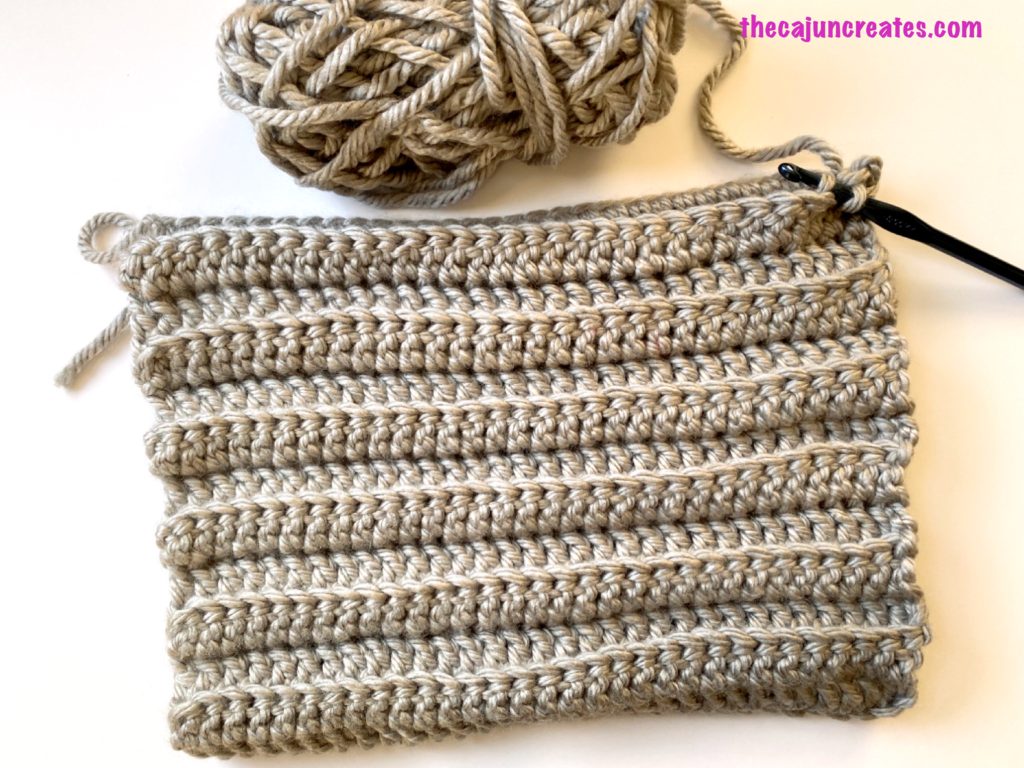
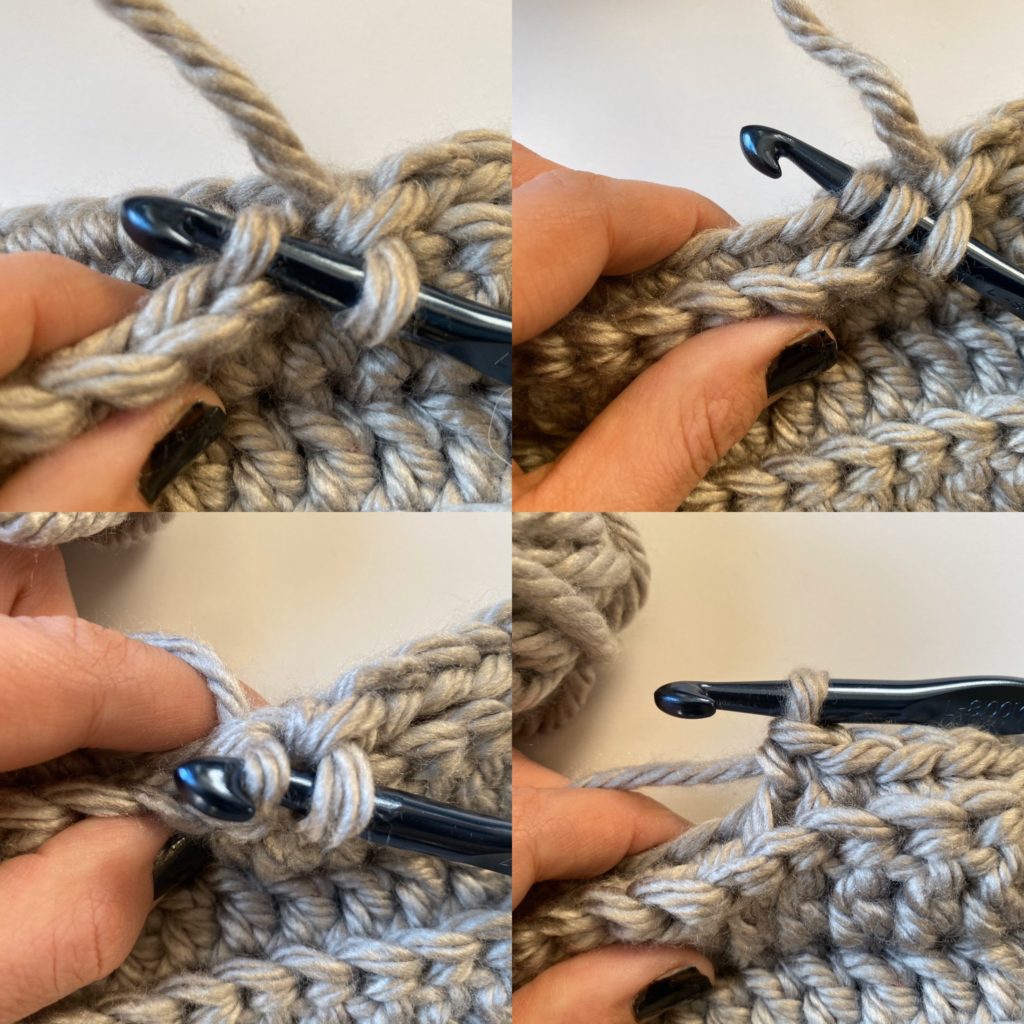
First, start by creating a chain as long as you want the height of your hat to be. For this hat, I did a foundation chain of 33 stitches, which made for a hat which is 13″ long. When the stretched chain is the length you want your hat, turn, skip the first 3 chains, and double crochet to the end (if you started with 33 chains, then you’ll have 30 dc once you’ve completed your first row).
At the end of the first row, chain 2, turn, and dcbl (Double Chain in the Back Loop only) to the end. Repeat until the hat is long enough so that it will fit all the way around when you wrap it around your head. For this hat, I did 24 rows of dcbl. Laying flat, it will look like this:
When your hat is long enough, fold it in half so that the shorter ends match up.
Slip stitch the two ends together (working only in the back loops of the top end).
Once you have a tube, sew up one end using a running stitch. Here I’ve sewn up my hat with pink yarn so you can see my stitches:
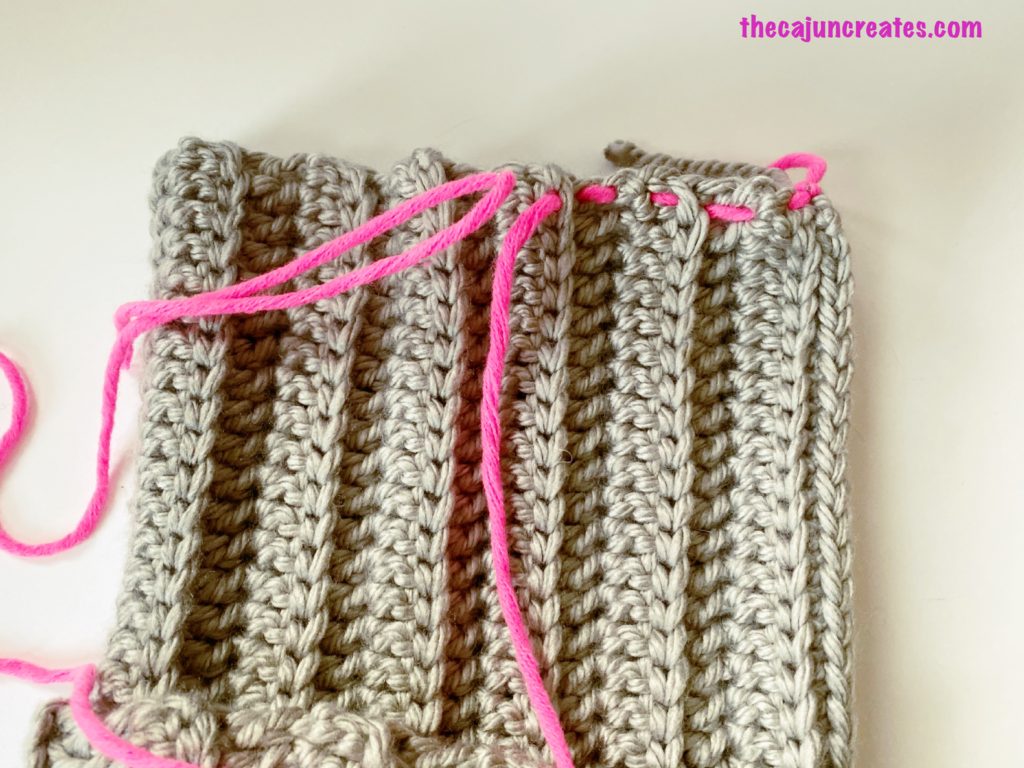
You won’t see the sewing yarn once you’ve pulled the hat tight enough. Pull the yarn tight and it will cinch up the hat.
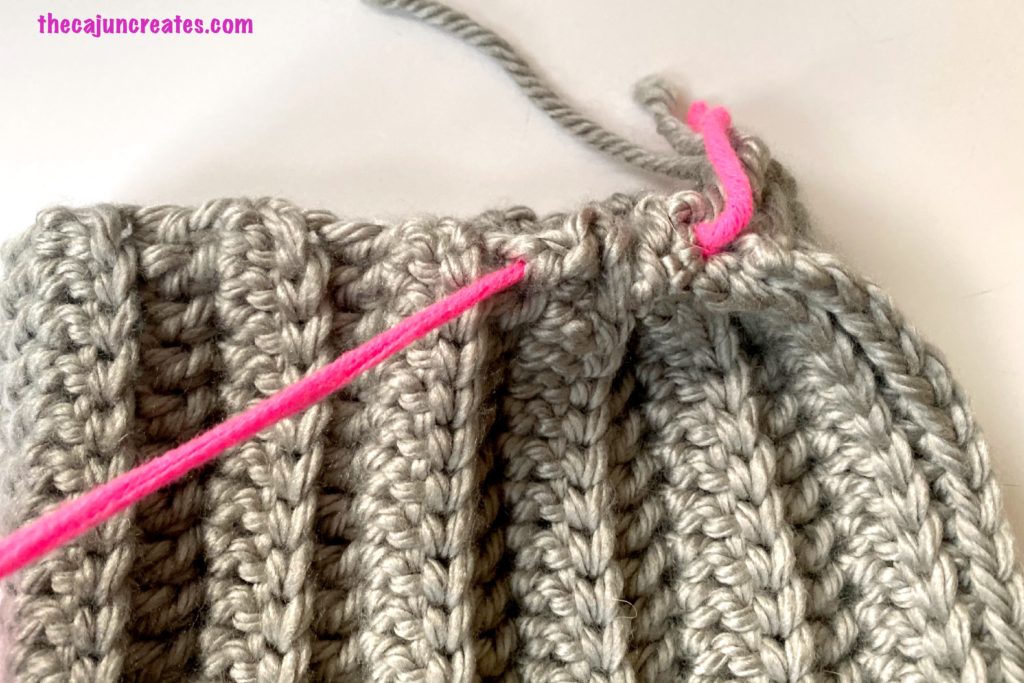
Continue around until you have cinched up the entire end. Tie the ends in a knot inside the hat to prevent it from loosening up, then weave in the ends of the sewing yarn. Now you’ve got a new warm and cozy hat!
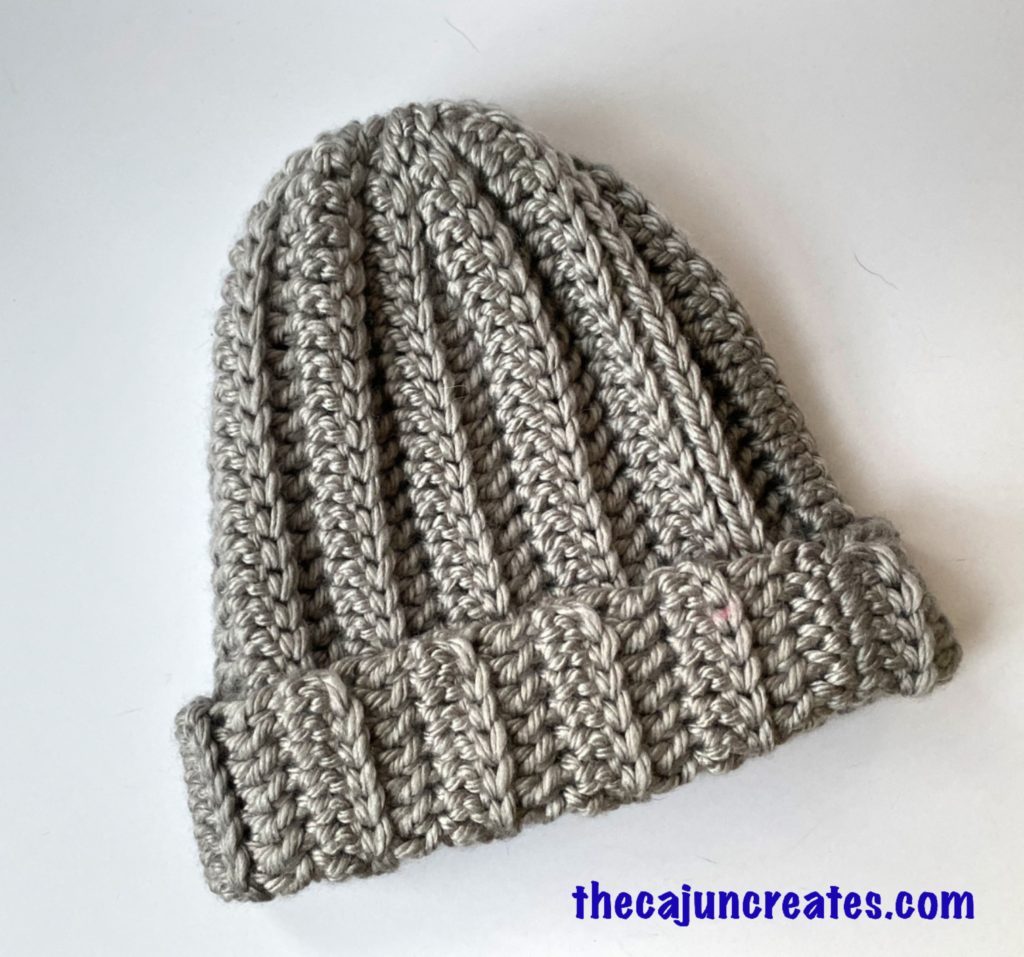
You can leave the hat as is, or add a pom pom. I added a pom pom that I made with my Clover Pom Pom maker to finish it off.

I’ve made two other hats following the same guidelines – I just adjusted the hook size and length of the initial chain based on how thick the yarn was.
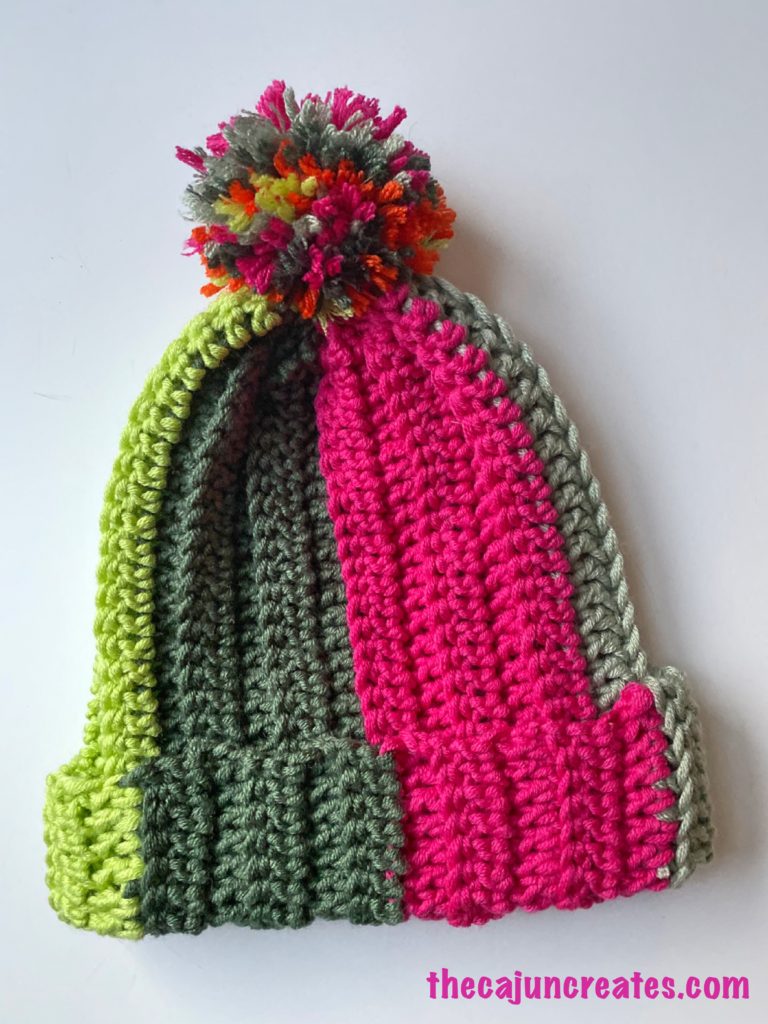
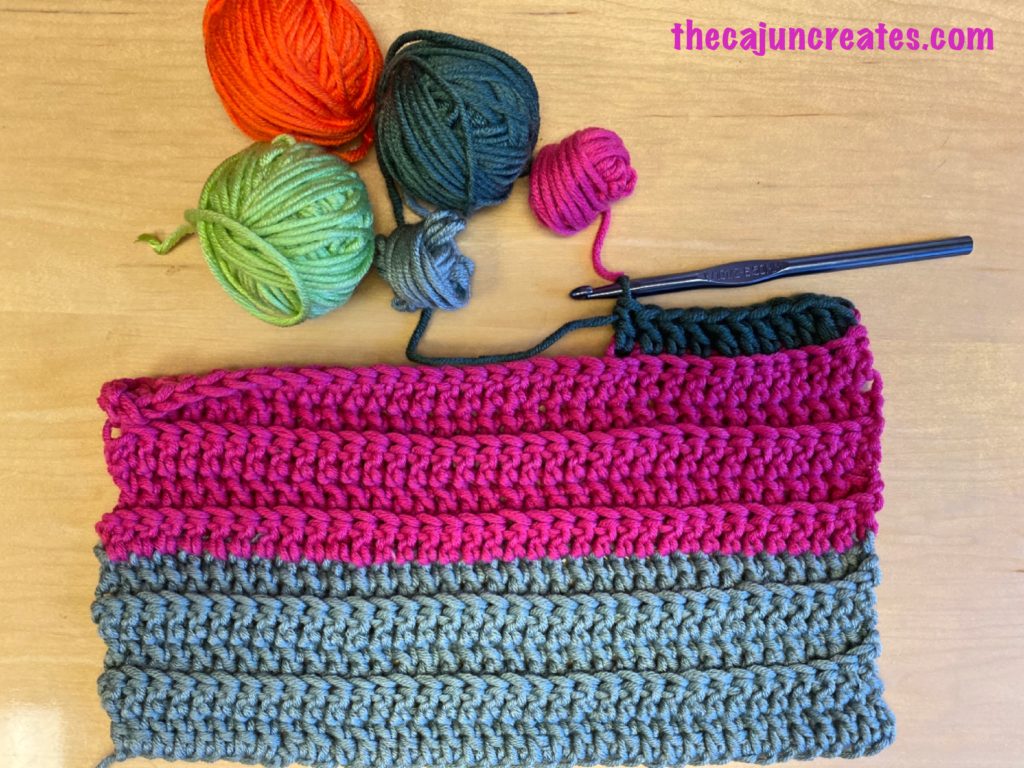
This hat was made with Caron X Pantone yarn, which comes as a set of 5 complementary colors, and a size K hook. Because this wasn’t as bulky, I started with a foundation row of 45 chains, and then adjusted the pattern accordingly. I completed 28 rows so that it would fit my head.
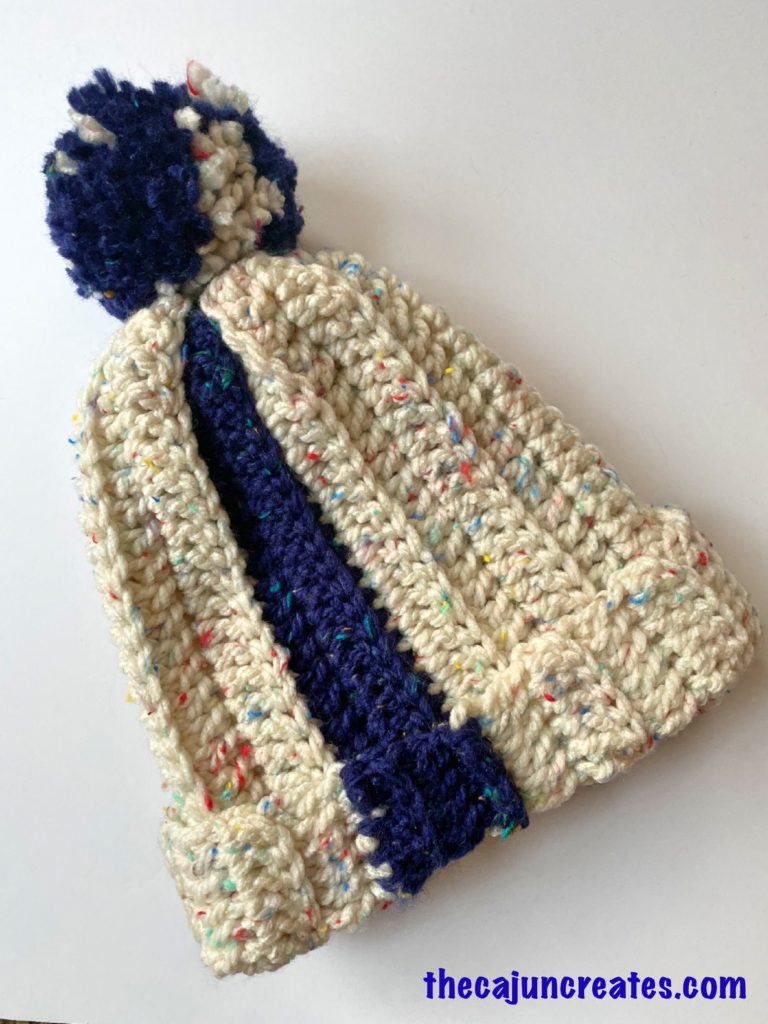
And then, finally, this hat was made with Premier Yarns, Serenity in Aran and Eclipse. This pattern is great because you can really customize this hat, mixing different colors as you go.
If you haven’t made a crochet hat yet, this is a great one to start with because it’s so quick and satisfying (and requires no shaping!). If you make one of these hats, I’d love to see it. Please tag me @thecajuncreates and tag your creation with #cajuncreatescozyhat! Or drop me a comment below!